7. Protein-ligand docking with Chimera and Vina
Now that you have your protein receptor and ligand files prepared you are ready to finally perform your docking simulation. As stated previously you will be re-docking the Imatinib drug molecule to the kinase domain of c-Abl that you obtained from PDB entry 1IEP. [1]
It should be noted that the type of docking we will do here will treat the ligand as flexible (apart from the rings which remain rigid throughout the simulation). The whole protein will be treated as a rigid system and will not undergo any changes during the docking process. Whilst it is possible to include side chain flexibility in the receptor region of the protein target, this rapidly becomes much more computationally expensive (and complicated to set up). The approach used in this tutorial is the default in vina and is a good starting point for any docking investigation although depending on the system you may want to consider receptor flexibility in real research work.
7.1. Set up the docking run with Chimera
In order to run, vina requires information about several things such as the names of the receptor and ligand files to use and various parameters that control how exhaustive the search for docking poses will be.
Whilst these can be easily provided to vina at run-time one key set of required information is more tricky, namely, the location and size of the box that vina will use to define the search volume.
This is difficult to define by simply looking at the receptor coordinates in the structure file. Fortunately, as with the dock prep feature, chimera also has a tool for setting up and then running a vina calculation that makes the definition of the simulation box much easier.
To begin, load the receptor and ligand files from the usual
File -> Open
menu option. This will give you a chimera view something like this

First, choose a location and name for the pdbqt format file that will contain the information about the ligand poses and scores. In this example the file name 1iep_sti_docking.pdbqt has been used as the Imatinib ligand name in the original PDB file was STI. The same section of the interface allows you to select the receptor and ligand structures from amongst whichever models you have loaded in the current chimera session.
The next step in setting up your vina calculation is to define the simulation box which is done using the interface found at
Tools -> Surface/Binding Analysis -> AutoDock Vina
This will open the interface where you can enter the box definition (Center and Size):
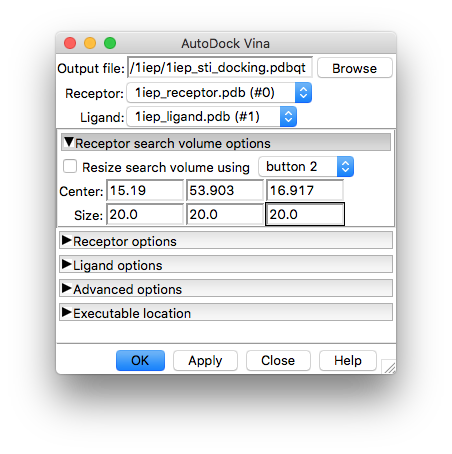
The values shown in the image correspond to those used in the vina command-line tutorial, so we will use those to keep things comparable to the AutoDock Vina tutorial.
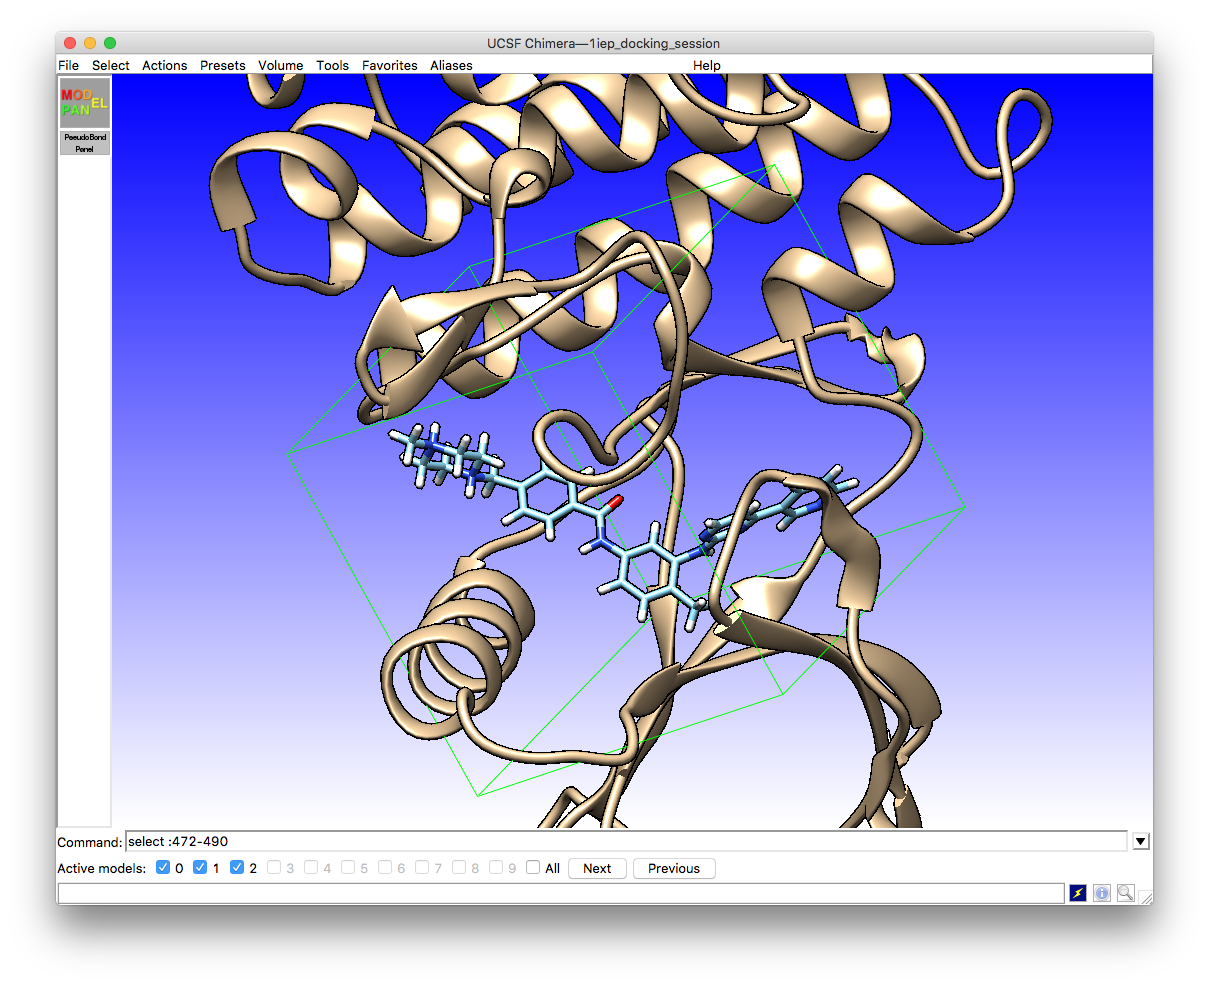
Once you have defined your simulation box it will appear on the screen around the ligand and receptor site
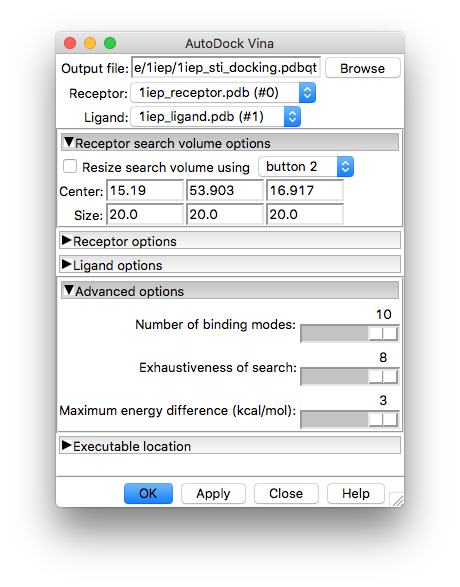
The receptor and ligand options tabs can be left alone unless you want to change the defaults there (not a good idea unless you have specific reasons to do so). However, you will need to enter the location of the vina program executable under the drop-down tab
Executable location
where you can either type in the location or browse the file system for it. Assuming you installed vina via conda as shown in the software installation page (and you are using Linux) your executable should be located at
/home/USER/miniconda3/bin/vina
Change USER to your user name on the computer you are working on.
7.2. The Vina calculation
The actual vina calculation can now be run from the AutoDock Vina interface by clicking on OK (or Apply if you want to keep the interface open).
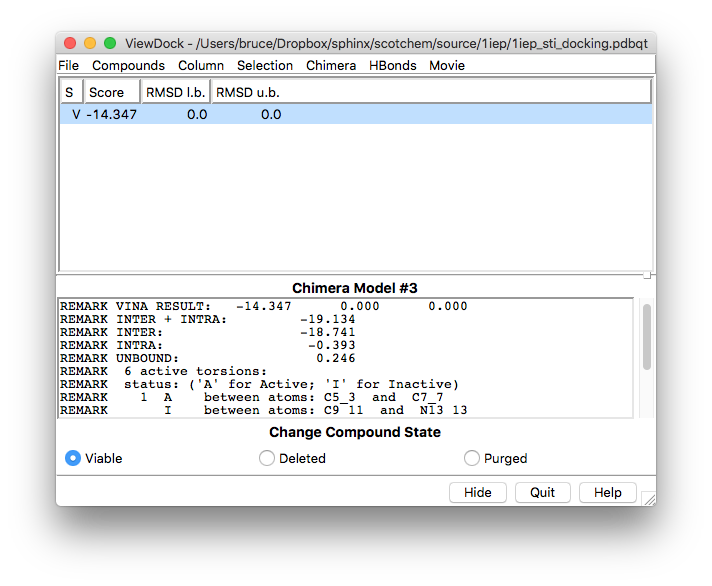
When the vina job is complete a new window for the ViewDock interface will open with the results of the calculation already loaded and showing a summary of those results for each of the ligand poses found (in this example vina only finds one pose in the energy window we specified even though it was told to find more)
Note
The ViewDock interface can be used at any time and not only as part of an ongoing calculation. You can use it to view and analyse the results of previous vina calculations regardless of whether they were run through chimera or not.
At the same time, the main chimera window is updated with the newly found pose that is highlighted in the ViewDock interface
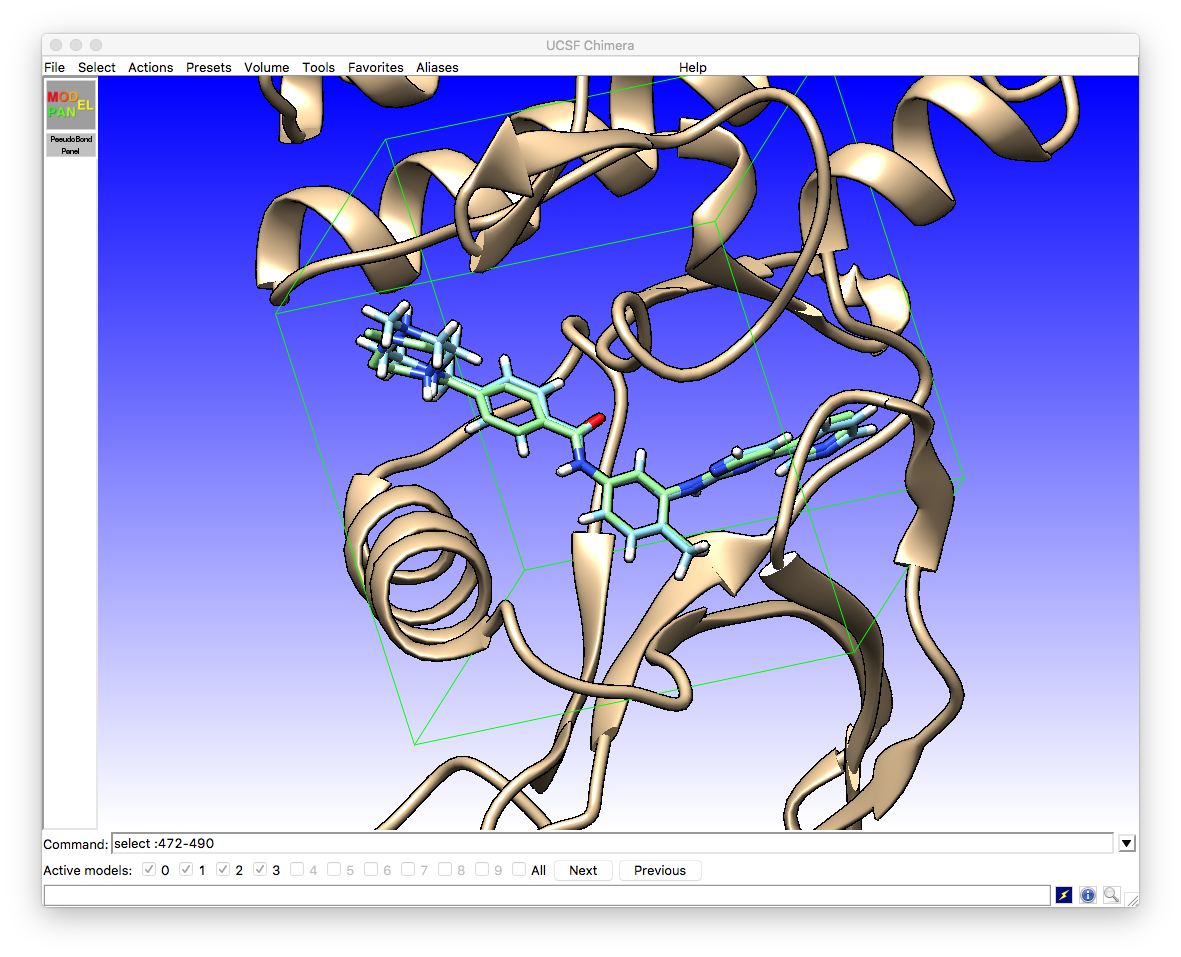
We can see that there is a very close agreement between the crystallographic pose (light blue) and the vina docked pose (green).
It is possible to obtain more information about the nature of the binding by asking chimera to search for potential hydrogen bonds between the ligand and receptor from the ViewDock interface using
HBonds -> Add Count to Entire Receptor
This will bring up the H-Bond Parameter interface where accepting the defaults will calculate the hydrogen bonds, add new columns to the ViewDock summary table and also create a visual representation in the main chimera window.
At first, only three hydrogen bonds are shown (those involving protein backbone atoms). You can obtain a better picture of all of the interactions by selecting the ligand and then using
Select -> Zone...
which will open this interface
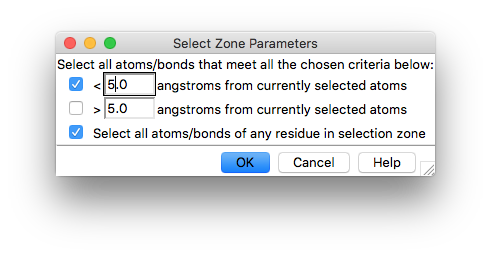
Check the box to select all atoms/bonds of the selected residues and click on OK.
Next use
Atoms -> Atoms/Bonds -> show
to display the side chains in the selection zone. You will now be able to see the rest of the hydrogen bonds.
By hovering the mouse over the residues taking part in the hydrogen bonds you will see pop-up labels containing the residue names. The hydrogen bonds involving backbone atoms should be Met94, His137 and Asp157. The residues forming hydrogen bonds via their side chains should be Glu62 and Thr91.
7.3. Running Vina from the command line
During the docking procedure that you have just completed chimera wrote all of the files that are needed to run vina. For example, if you chose the name of the output file to be 1iep_sti_docking.pdbqt then you will find the following files in the directory that you selected
1iep_sti_docking.conf
1iep_sti_docking.ligand.pdb
1iep_sti_docking.ligand.pdbqt
1iep_sti_docking.receptor.pdb
1iep_sti_docking.receptor.pdbqt
The pdb files are written as a record of the input ligand and receptor structures whilst the pdbqt files are the ones actually used in the docking procedure. The 1iep_sti_docking.conf file contains details of the docking box and the other parameters that were specified
center_x = 15.19
center_y = 53.90
center_z = 16.92
size_x = 20.00
size_y = 20.00
size_z = 20.00

energy_range = 3
exhaustiveness = 8
num_modes = 10
Now that you have this file with the box defined it is possible to rerun the calculation you did above using vina from the command line with the following
vina --config 1iep_sti_docking.conf --receptor 1iep_sti_docking.receptor.pdbqt --ligand 1iep_sti_docking.ligand.pdbqt --out 1iep_sti_docking_rerun.pdbqt
Notice that the output filename is different from before to avoid simply overwriting the previous job results.
Alternatively, you can put all of this into the .conf file
receptor = 1iep_sti_docking.receptor.pdbqt
ligand = 1iep_sti_docking.ligand.pdbqt
out = 1iep_sti_docking_rerun.pdbqt

center_x = 15.19
center_y = 53.90
center_z = 16.92
size_x = 20.00
size_y = 20.00
size_z = 20.00

energy_range = 3
exhaustiveness = 8
num_modes = 10
and then run the job as
vina --config 1iep_sti_docking.conf
Perhaps more importantly, using the .conf file / command line approach shown here it is simple to adapt your job to e.g. increase the exhaustiveness parameter or repeat the docking for a different ligand. Whilst using chimera is by far the simplest way of setting up the required simulation box and so on for a single job, getting used to using vina from the command line will give you much greater control and provide access to the full range of features available in vina.
7.4. Further work / excercises
This tutorial provides a very basic introduction to the protein-ligand docking problem. If you want to learn more about the vina software and advanced docking topics the vina documentation site is a good place to start.
References