6. Preparing the protein and ligand for docking
For the purposes of our protein-ligand docking calculations we will use the AutoDock Vina software. Detailed information can be found on the vina website at the Scripps Institute.
The main issues you will be faced with in getting started with protein-ligand docking calculations are preparation of your structures and the setup of the configuration files required. For example, simply obtaining the coordinates of the center of the binding site and then deciding on the dimensions of the search volume to be used by the docking software can be tricky without some graphical indication to suggest where to start.
Fortunately, the UCSF Chimera software package can be used to simplify the setup of docking calculations with vina through its dedicated interface.
In this practical we will be attempting to re-dock a known protein-ligand system obtained from the RSCB Protein Data Bank (PDB) website. For this we will use PDB entry 1IEP which contains the structure of the kinase domain of c-Abl and the inhibitor drug Imatinib [1]

Imatinib contains quite a high proportion of rotatable bonds making it very flexible so this is a good challenge for the docking method in vina.
Note
This protein-ligand system has been chosen because it has been a staple example in the docking community for several years. In addition to this, it is also the system used in the Autodock Vina documentation but there all structure preparation and manipulation is done using commandline tools only. Completing the current tutorial will make it much easier to get started with and follow the more advanced docking examples on the Vina site.
An older video tutorial using the AutodockTools graphical interface is also included on the Vina website.
6.1. Getting started
During the installation process for chimera (and depending on your operating system) you may have chosen to create a desktop icon. If so, you can start chimera by double-clicking on it as usual.
More generally, you can start the software by typing
chimera
at the command line. Either way, chimera will start with a window that looks like this
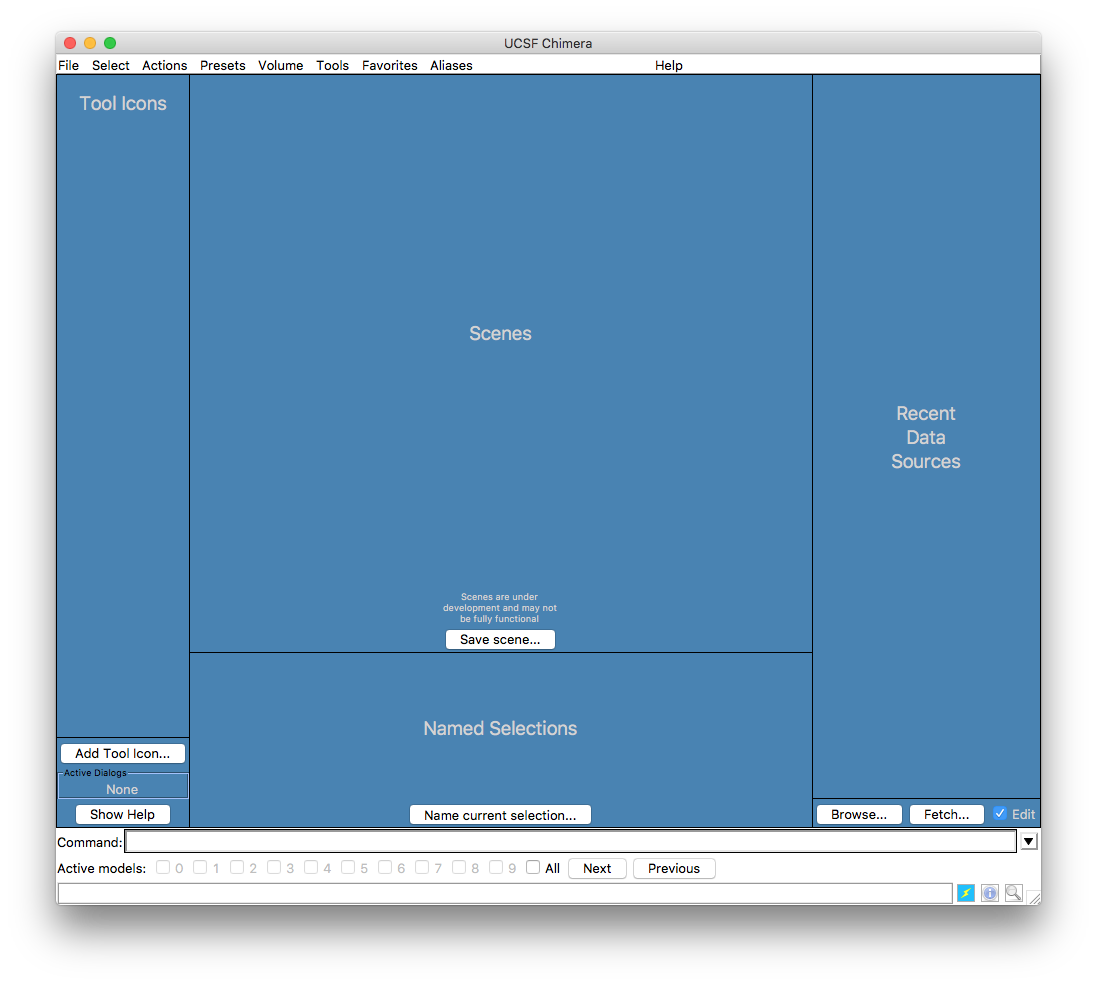
If you have already used chimera the Recent Data Sources pane will contain buttons that allow you to re-open previous models.
You could go to the PDB website and manually download the structure that you need bu chimera automates this process through its Fetch structure by ID interface which can be opened using the Fetch... button on the lower right of the startup window or through
File -> Fetch by ID...
The following interface will open up. Select PDB and enter the PDB accession code for the structure (upper- or lower-case are both fine)
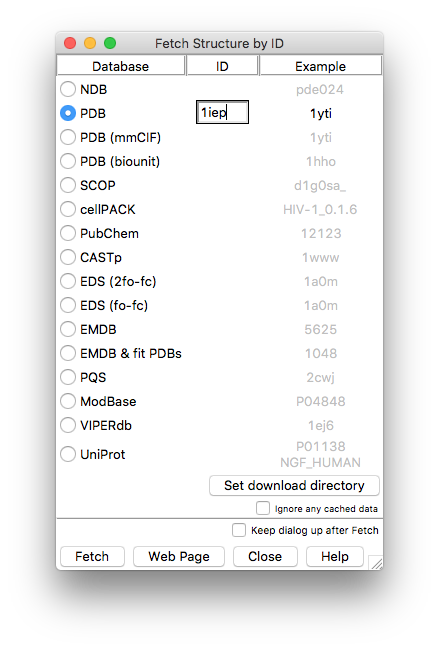
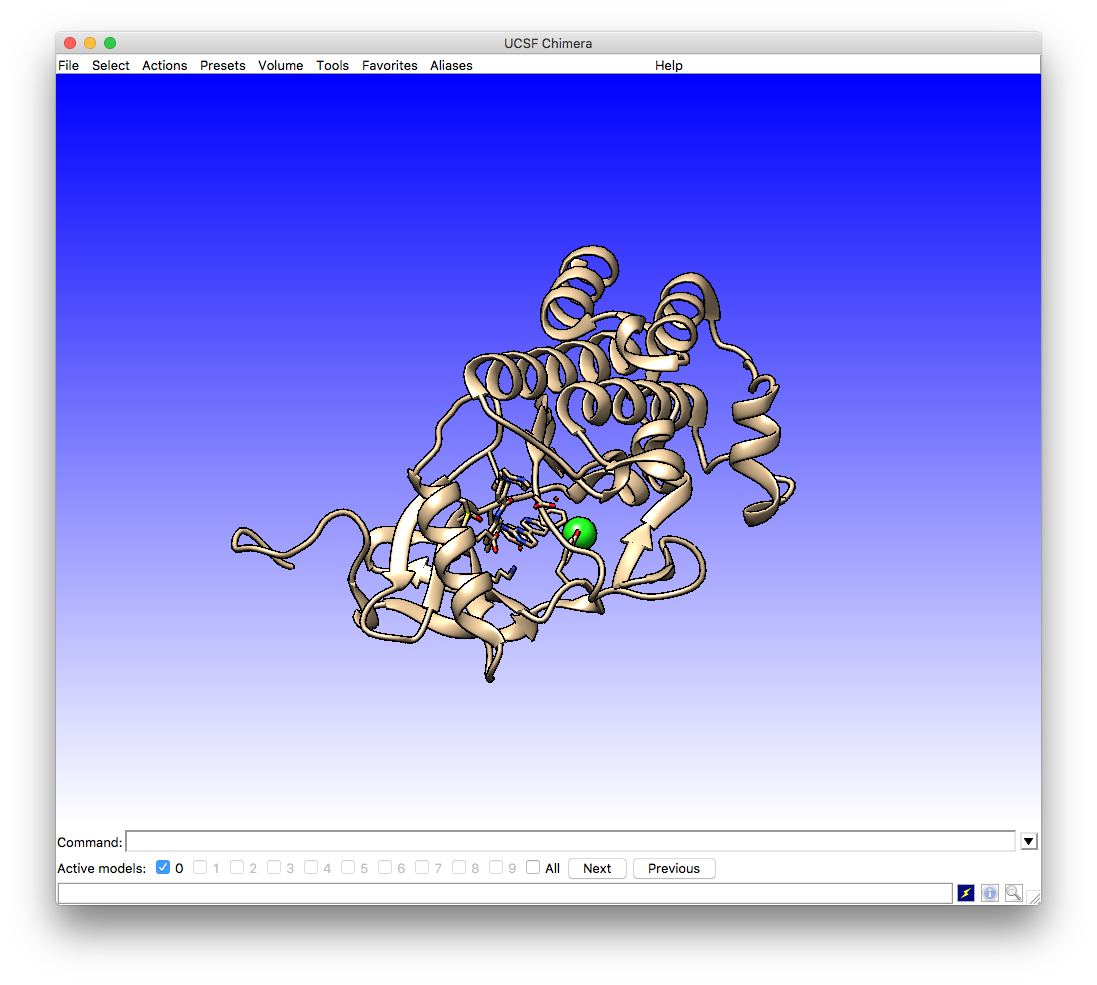
Pressing Fetch will download the structure and display it in the chimera main window.
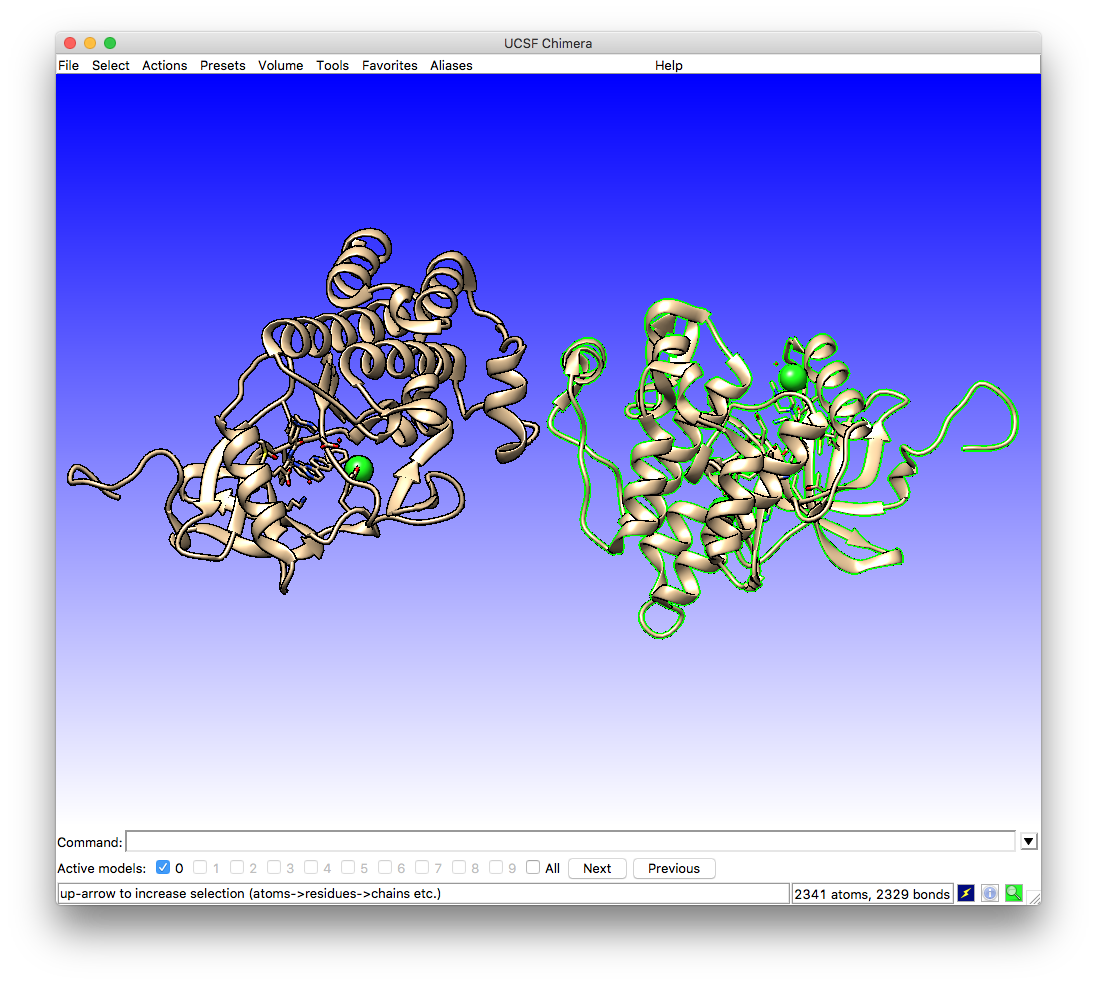
As you will see, the 1IEP structure file contains two repeats of the protein-ligand complex. In the pdb file these are called chain A and chain B. You can see which is which in the chimera window by hovering the mouse pointer over the protein chains. A label will appear giving the name and number of the residue along with the chain ID e.g. MET 225.A and MET 225.B (these are at the ends of the protein loops farthest from the center of the model).
As we only need one for the docking simulation we will keep chain A. To do this we can select chain B using
Select -> Chain -> B
which will change the model view by highlighting the selected chain in green:
The highlighted model can be removed by using
Actions -> Atoms/Bonds -> delete
leaving you with only chain A.
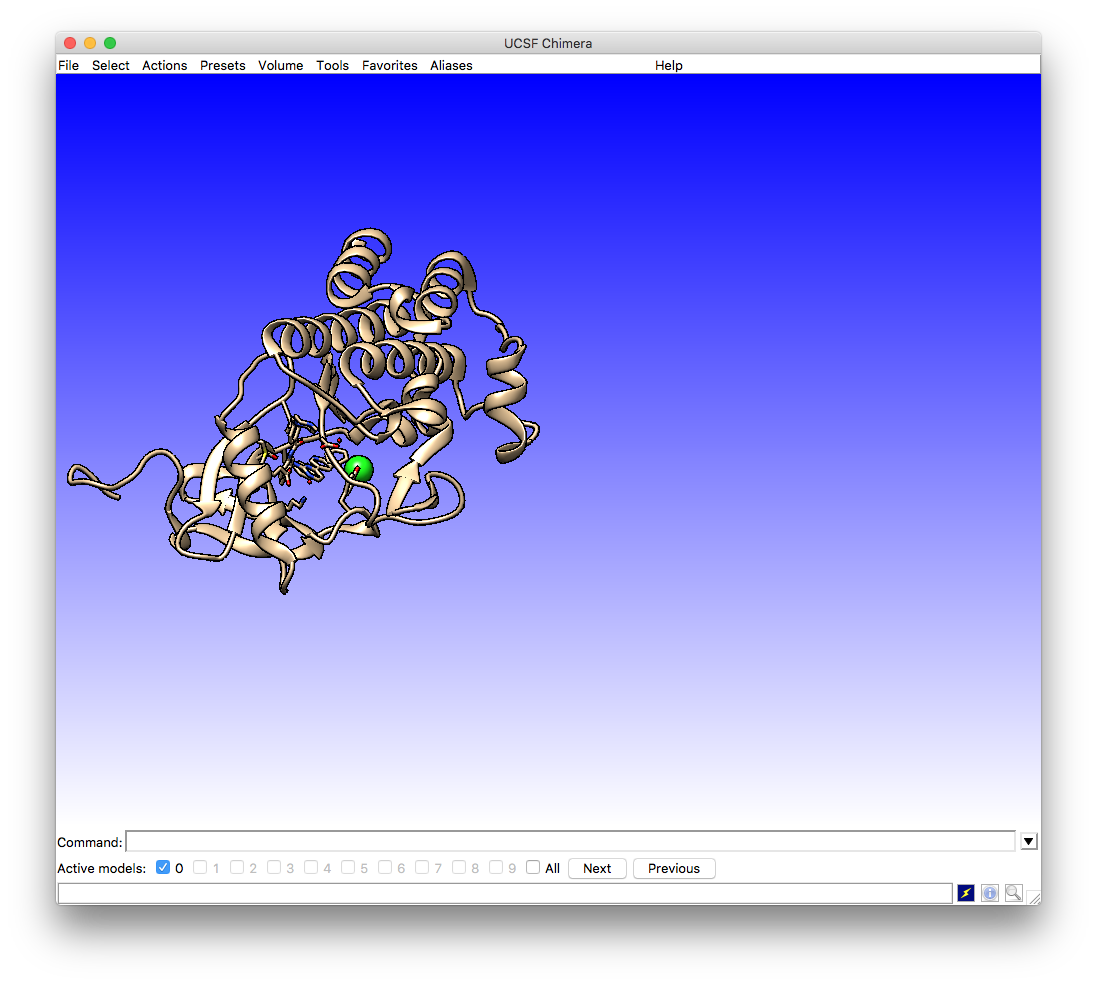
It is not very convenient to have the model we want to work on sitting at the edge of the screen, so you can either move it using the mouse or more simply by
Actions -> Focus
Now that you have the structure that you want to study you can start to prepare it for use with vina.
6.2. Prepare the receptor and ligand
It is necessary to clean up our protein/ligand system before we try feeding it to our docking software. Much of the necessary preparation can be done by directly editing the pdb file but this is time consuming and over-complicates the process (and makes it easy to introduce errors). Fortunately, Chimera has built-in functionality to simplify this task which can be accessed through the Dock Prep interface:
Tools -> Surface/binding analysis -> Dock Prep
The Dock Prep tool automates several important steps such as deleting solvent molecules and adding hydrogens.
It also checks for amino acids that have incomplete side chains (these can be omitted from the PDB file because they were poorly resolved in the crystallographic study). If it finds any, it will replace them with the best fitting rotamer from an internal library of geometries. This could in principle be a problem if the replaced side chain is part of the binding site you wish to study - but you should think twice about using a structure with part of the binding site missing anyway.
By default Dock Prep adds charges to the system. This is necessary for the DOCK software and its scoring function but as we are using vina we do not need to go to the bother of adding charges so you can deselect this option. However, our system does have chloride ions which we can ask Dock Prep to remove by selecting the Delete non-complexed ions option.
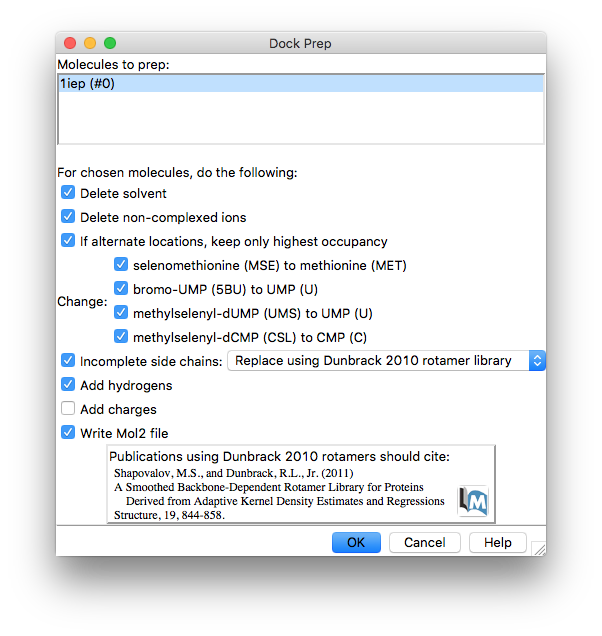
Once Dock Prep is complete you will be prompted to save the prepared protein + ligand as a mol2 format file. Choose/create a suitable folder and save the system as e.g. “1iep_A_dock_prep.mol2”.
Now you want to separate the protein and ligand for use in the actual docking calculation. The simplest way to do this is to select each one in turn and save them as individual pdb files. To select the ligand (called STI in the PDB file) use
Select -> Residue -> STI
Now choose File -> Save PDB... and save the ligand as e.g. “1iep_ligand.pdb”.
Warning
Chimera will save all atoms in the system by default, regardless of what is selected on the screen.
In order to only save the ligand you must select the Save selected atoms only option.
You can now save your protein by selecting it with
Select -> Residue -> standard amino acids
and saving as e.g. “1iep_receptor.pdb”.
Note
There is another (manual) way to make selections in chimera. Hold down the ctrl key on the keyboard and then use the left mouse-button to click on part of the model you want to select. the part you picked will be highlighted in green but it will only be part of the model. To expand the selection you can use the up/down arrow keys.
This can be very useful but be careful to check that you have actually selected the thing that you wanted as it is fairly easy to miss parts or expand the selection too far.
Now that you have prepared your protein and ligand you are ready to proceed with the actual docking simulation. The instructions for this can be found on the page Protein-ligand docking with Chimera and Vina.
References